Elementor 101 · Lesson 10 · Pro
Popups, forms and interactions
Popup triggers and conditions, the new Atomic Forms, and motion that respects your visitors.
Written for Elementor 4.3.3 · Elementor Pro 4.3.1 · Updated October 2026
01Popups: a template with rules
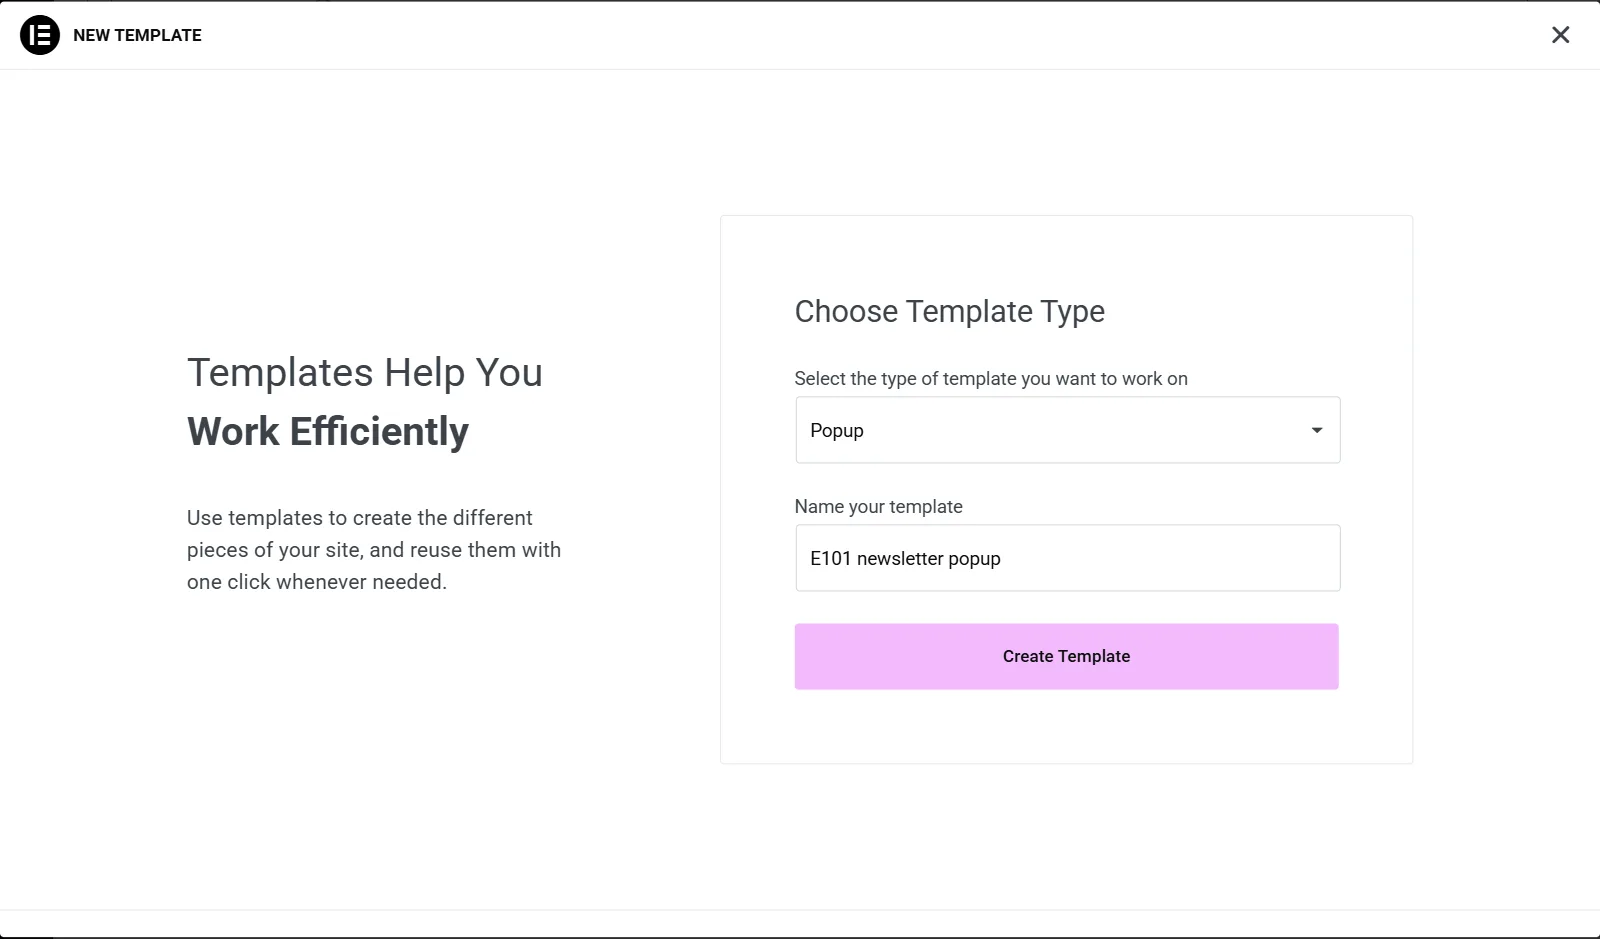
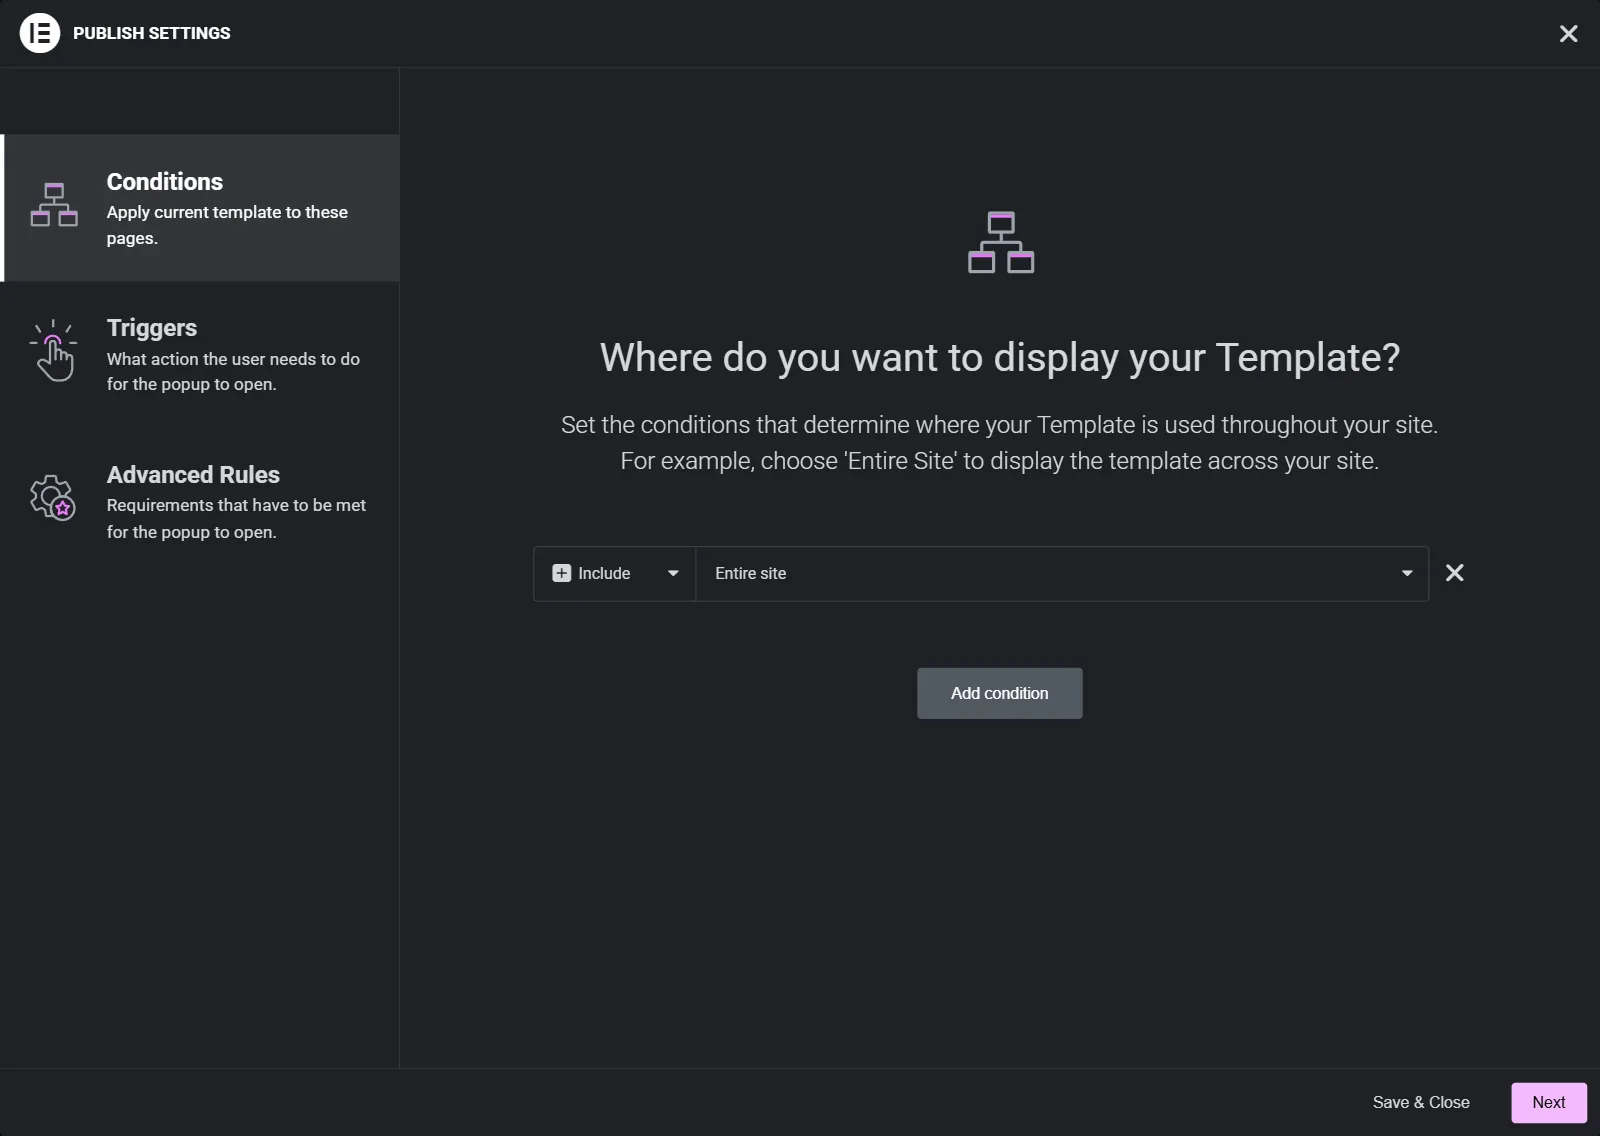
A popup is a template you design like any other. It also has three sets of rules, which you set when you publish it:
- Go to Elementor › Editor › Templates › Popups › Add New Popup, or start from a ready-made popup such as the Katka popups.
- Set the size, position and overlay in Popup Settings in the top bar, then design the content.
- Click Publish and work through the three tabs: Conditions, Triggers, Advanced Rules.
02Triggers and rules that don't annoy people
| Trigger | Good for |
|---|---|
| On Click | Booking forms, video, "get the quote" — the visitor asked for it. |
| On Scroll (e.g. 60%) | Newsletter offers after someone has read the content. |
| On Scroll To Element | An offer that belongs to one section, such as pricing. |
| On Page Exit Intent | A last offer as the mouse leaves the window (desktop only). |
| After Inactivity | Gentle help prompts. |
| AdBlock Detection | A polite "please allow ads" note, if your site depends on them. |
| On Page Load | Rarely — important notices only. |
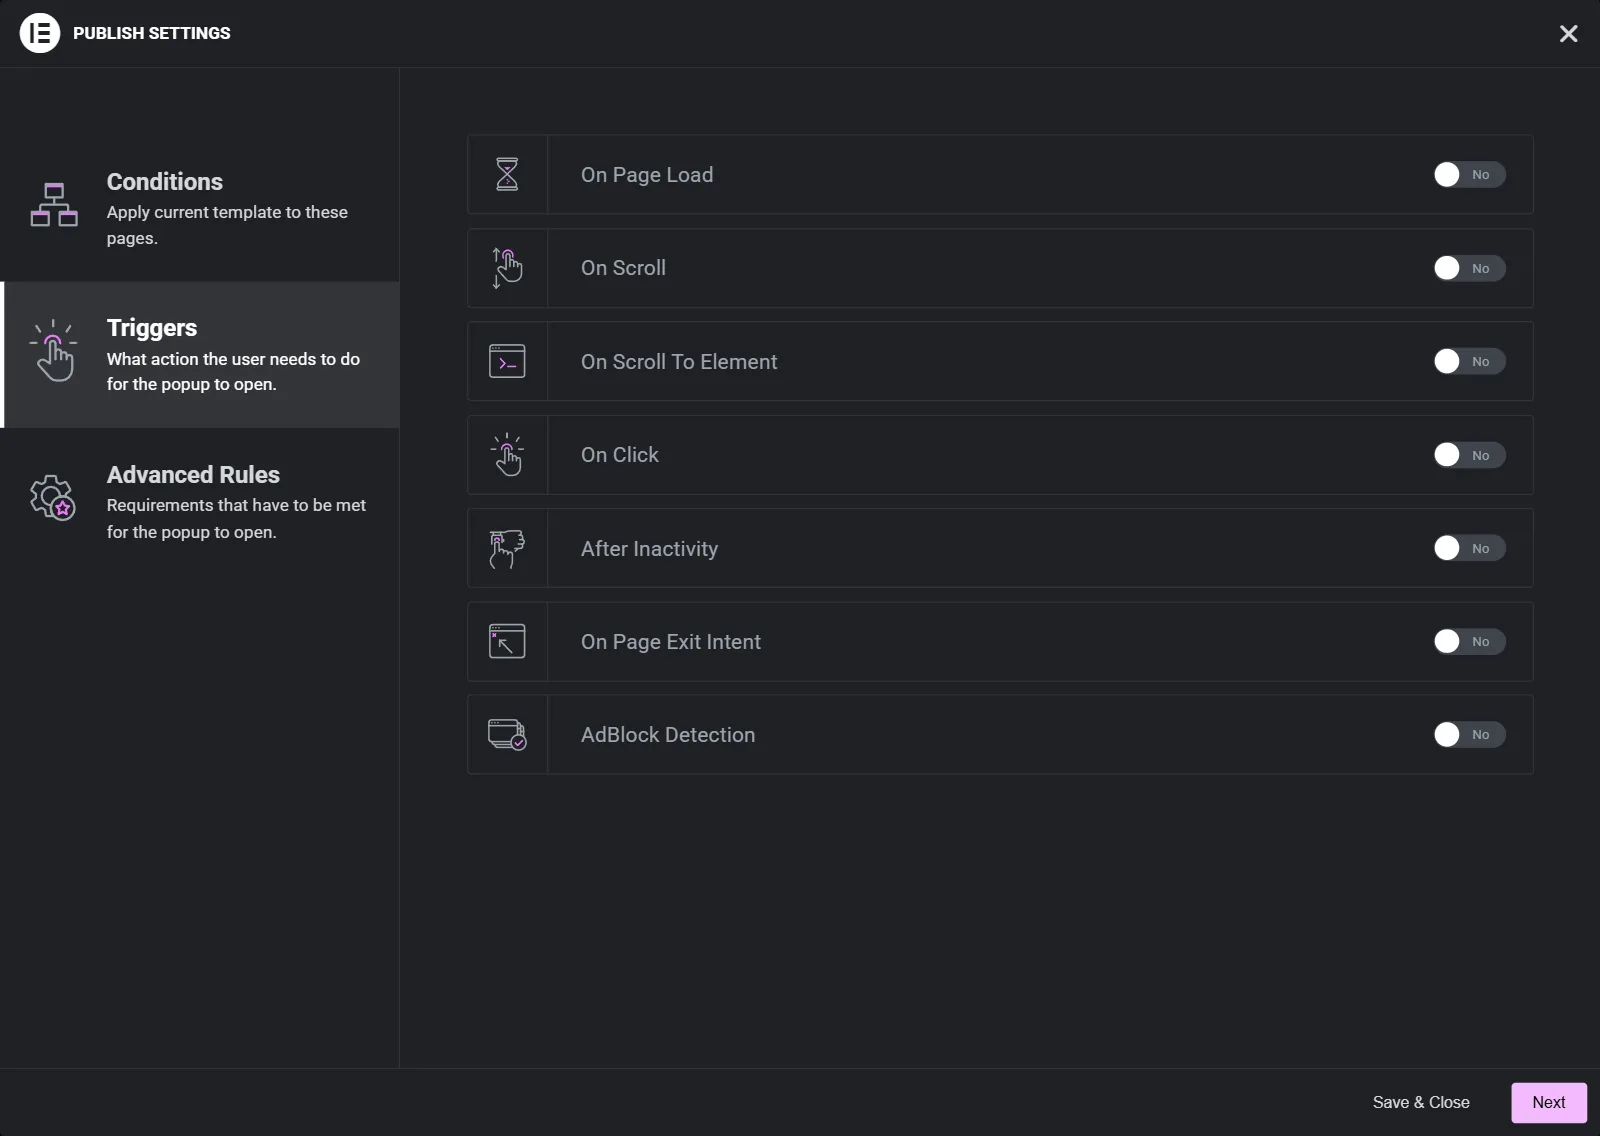
In Advanced Rules, limit how often it shows (for example once per session), hide it from logged-in users, and hide it from visitors arriving from your newsletter. In the popup settings, make sure it can be closed with a visible button and the Esc key.
03Atomic Forms
Forms in version 4 are built from parts. An Atomic form element is the container, and every field is its own element that you drag in from the Atomic Form group: Label, Input, Text area, Checkbox, Radio button, Select, Date picker, Time picker, File Upload and Submit button. Fields use the same Style tab, Classes and Variables as the rest of your site, so forms finally match your design without extra effort.
- Add an Atomic form, then drag in a Label + Input pair for name and email, a Text area and a Submit button.
- Mark the required fields and set the input type (email, tel) so phones show the right keyboard.
- In the form's settings, choose what happens on submit: email notification, redirect, or a connected marketing tool.
- Send a test submission and confirm the email arrives. If it doesn't, read the SMTP guide.
04Interactions: motion with a purpose
Atomic Elements support Interactions. Entrance interactions are available to everyone. Pro adds triggers that react to scrolling, hovering and clicking, plus a Custom effect where you define exactly how an element moves between states. Interactions can differ per breakpoint.
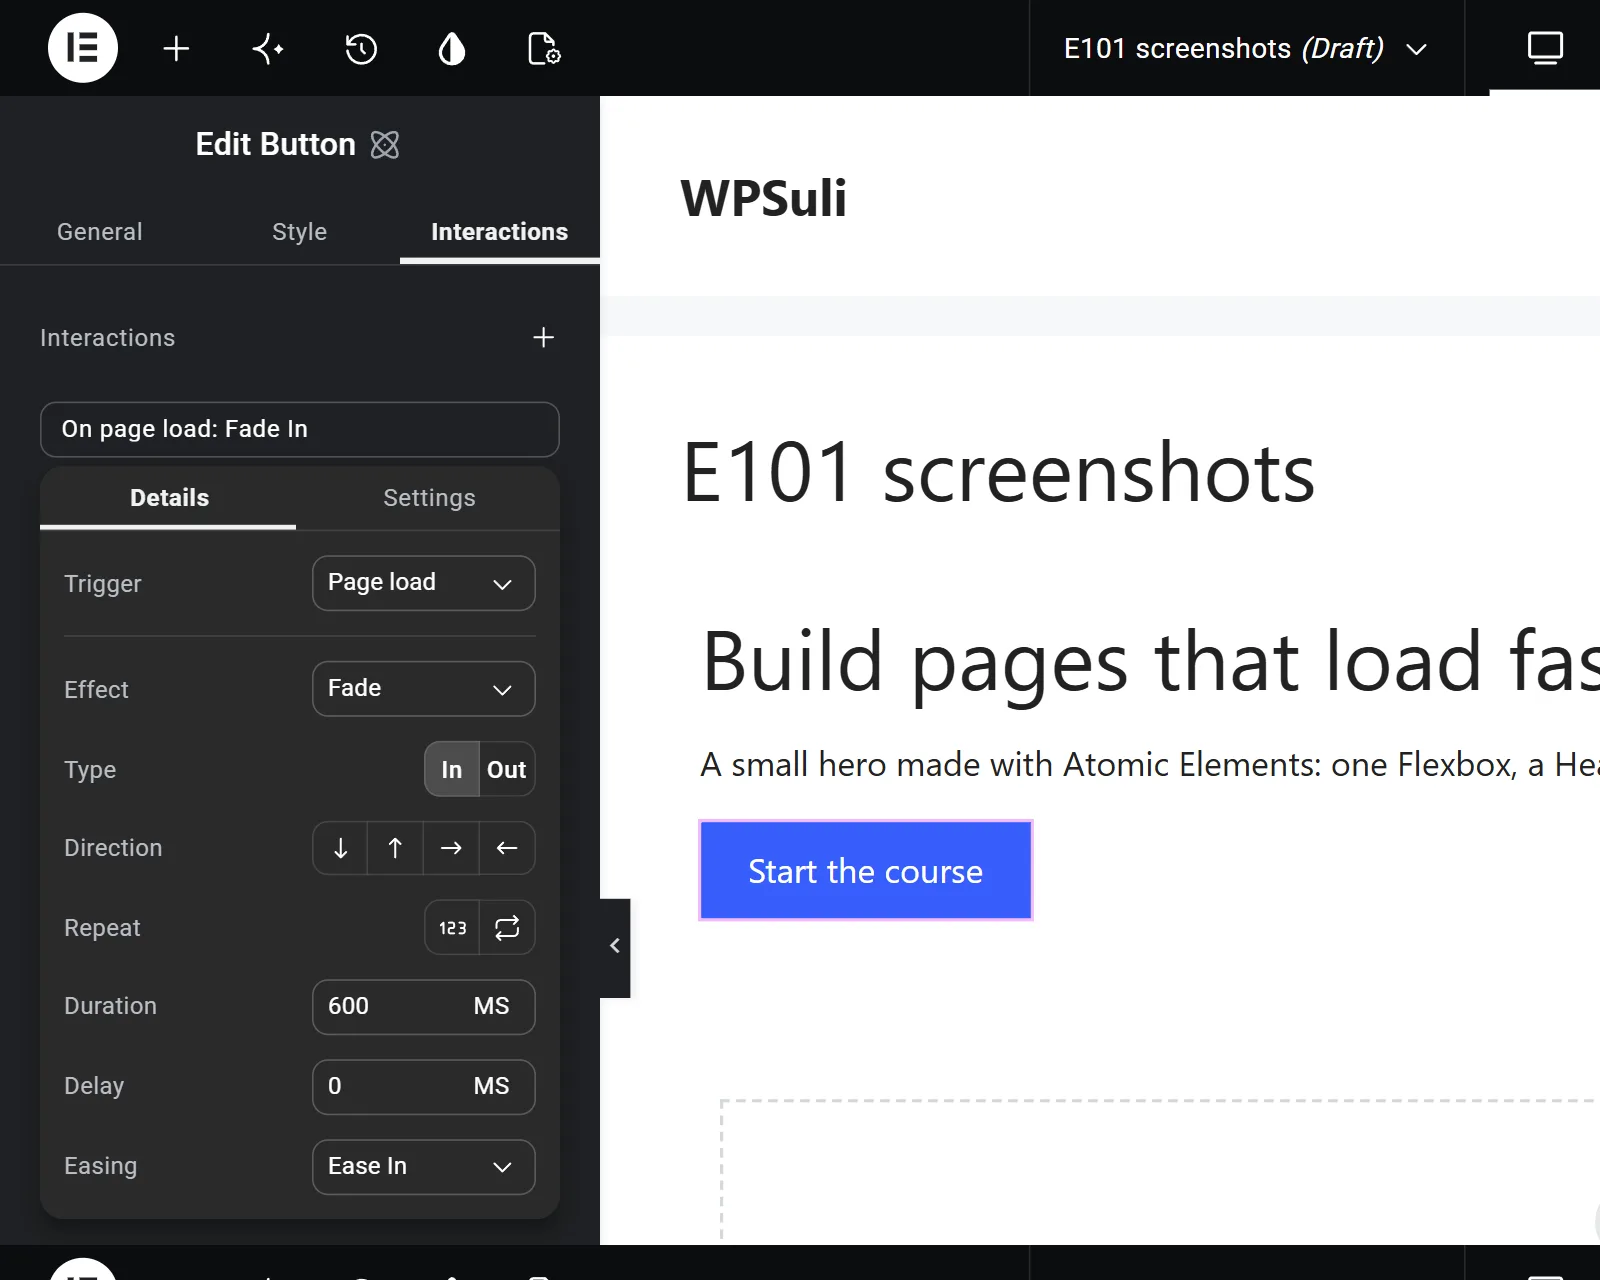
- Select an element and open its Interactions tab.
- Click Create an interaction. You get a ready-made "On page load: Fade In" to adjust.
- Pick the Trigger: Page load, Scroll into view, While scrolling, On hover or On click.
- Set the Effect, the direction, and the Duration, Delay and Easing.
- Use motion to guide attention, such as revealing steps in order, not to decorate every element.
- Keep it short (200–500 ms) and subtle on mobile, or turn it off there.
- Respect visitors who prefer reduced motion. Test with that system setting turned on.
05Common mistakes
- A page-load popup on every page. It's the fastest way to lose visitors, and on mobile it can hurt search rankings.
- Never testing form emails. Many hosts silently drop PHP mail. Test every form after launch.
- Animating everything. When everything moves, nothing stands out, and the page feels slower.
✓Quick quiz
Three questions to check the essentials. Get them all right to complete the lesson.