Elementor 101 · Lesson 09 · Pro
Theme Builder: headers, footers and dynamic templates
Site parts, display conditions, single and archive templates fed by dynamic content.
Written for Elementor 4.3.3 · Elementor Pro 4.3.1 · Updated October 2026
01What the Theme Builder replaces
So far you have designed pages. The Theme Builder designs the templates WordPress uses everywhere else. Each one is called a site part:
Open it from Elementor › Theme Builder in the WordPress menu. Every site part has an Add New button. The eighth part, Loop Item, is the design of one card in a post list; you'll use it in the archive step below.
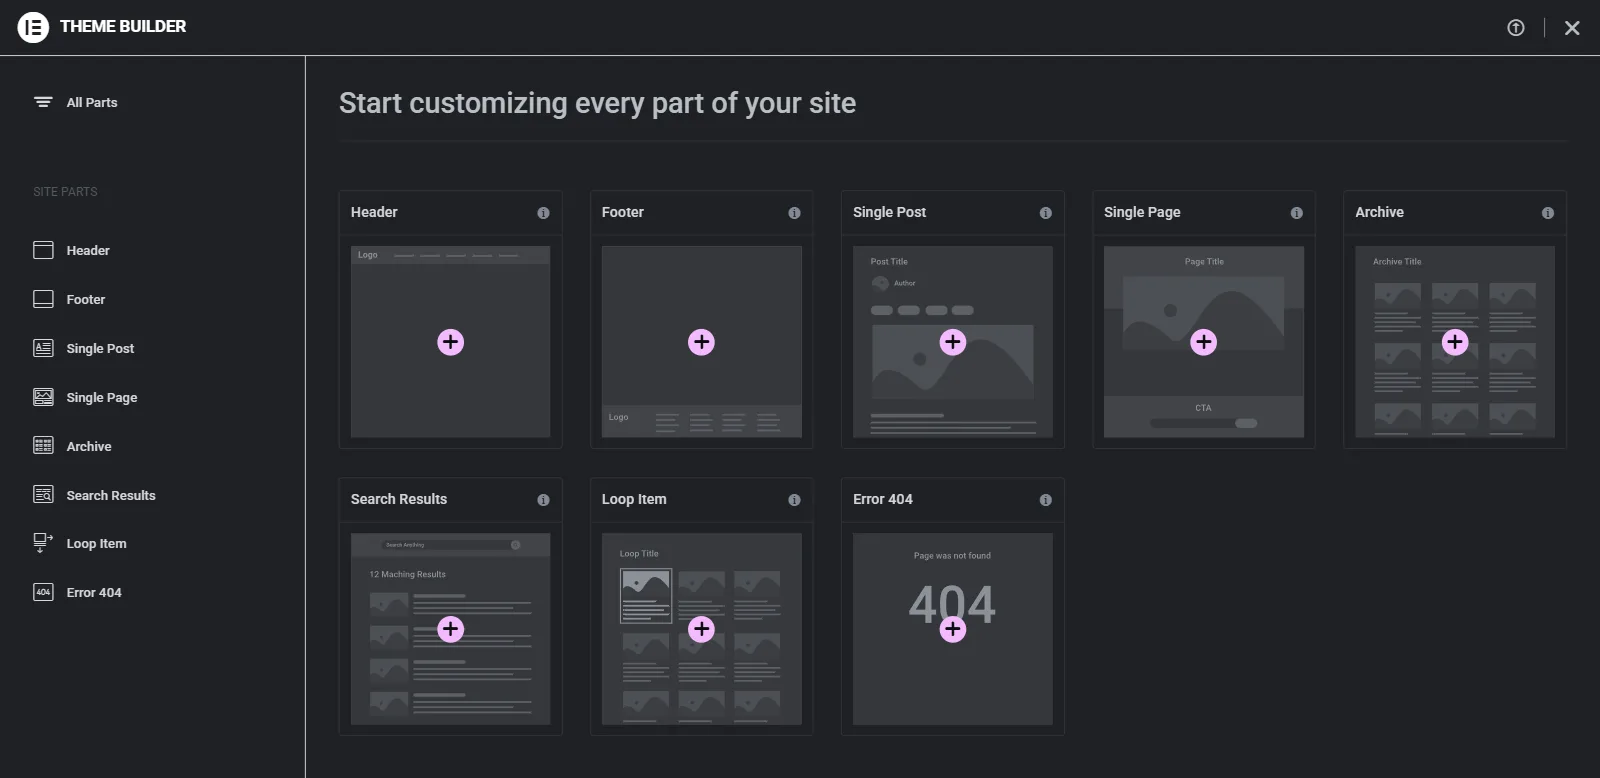
Once you've created site parts, a green dot on a site part means it's live (it has display conditions). A gray dot means it's a draft that isn't shown anywhere.
02Build a header
- In the Theme Builder, click Add New on the Header card. Skip the library, or pick a starting design.
- Add a Flexbox in a row with space-between and items centred.
- On the left, add the Site Logo widget, which pulls the logo from Site Settings.
- In the middle, add the Menu widget and choose a WordPress menu from Appearance › Menus.
- On the right, add a Button with your
btn-primaryClass. - On mobile, set the Menu to collapse into a toggle (hamburger) and hide the button if space is tight.
- For a sticky header, set Position to sticky with top 0 on the outer Flexbox, and give it a background so content doesn't show through.
03Display conditions
Clicking Publish on a site part opens display conditions. They decide where the template appears.
- Entire Site: the usual choice for headers and footers.
- Include or exclude specific pages, post types, categories, authors, archives or the 404 page.
- When two templates match, the more specific condition wins. For example, a "Blog" category header beats the Entire Site header on those posts.
Edit conditions later from the site part card with Edit Conditions, without opening the editor.
04A single post template with dynamic content
A single post template is a layout without real content. Widgets fill it in for every post:
- Post Title, Post Info (date, author, categories), Featured Image.
- Post Content outputs whatever you wrote in the WordPress editor. You must include it, or posts render empty.
- Author Box, Post Navigation and a Loop Grid of related posts at the bottom.
Any Atomic Element can be dynamic too: hover over it and use the dynamic content icon in the floating action bar to pull the post title, a custom field or the site name. Use Preview settings to choose a sample post while you design.
05Archives and the Loop Grid
An archive template lists posts: the blog page, category pages, search results. The key piece is the Loop Grid:
- Create a Loop Item template. It's the design of one card: featured image, title, excerpt, read-more link.
- In the archive template, add an Archive Title and a Loop Grid, and choose your Loop Item.
- Set the columns per device and the pagination.
- Set the condition to All Archives, or narrow it down.
06Common mistakes
- Forgetting the Post Content widget. The template looks fine in the editor, but every post shows an empty body.
- Publishing without conditions. A site part with a gray dot is a draft, and the theme's own header keeps showing.
- The REST API is blocked. A security plugin that disables it breaks the Theme Builder. You'll see templates that won't load or "you are not allowed" errors.
✓Quick quiz
Three questions to check the essentials. Get them all right to complete the lesson.